Your Rudraksha mala breaks unexpectedly. A few beads fall onto the floor, the thread comes loose, and your first thought is probably:
Can I repair this mala, or do I need to buy a new one?
The good news is that a broken thread does not automatically mean your Rudraksha beads are damaged.
In most cases, if the beads are intact, you can restring the mala and continue using it.
Whether you own a traditional 108-bead mala, a Rudraksha Kantha or a simple necklace, understanding how to restring it properly can help preserve the beads and prevent another break.
Here is a simple guide to getting your mala back into good condition.
Why Do Rudraksha Malas Break?
Rudraksha beads are naturally hard, but the thread holding them together can weaken over time.
Several everyday factors contribute to breakage.
Regular friction: Beads repeatedly moving against the thread can gradually wear it down.
Moisture exposure: Sweat, bathing and humidity may weaken certain natural threads.
Tight stringing: Excessive tension can place unnecessary pressure on the thread and beads.
Age: Cotton and other natural fibres gradually deteriorate with use.
Accidental pulling: A mala can break when caught on clothing, jewellery or furniture.
In many cases, the problem is the string rather than the Rudraksha itself.
What Should You Do Immediately When Your Mala Breaks?
Before attempting any repair, collect the beads carefully.
Follow these steps:
- Gather all the fallen Rudraksha.
- Place them on a clean, soft cloth.
- Count the beads.
- Keep the guru bead and tassel separately, if present.
- Inspect each bead for visible damage.
- Photograph the original arrangement if possible.
If your mala contains different Mukhi, avoid mixing them without recording their positions.
This is especially important for combinations such as a 1–14 Mukhi Siddha Mala.
The arrangement may be part of the mala’s intended traditional configuration.
What Materials Do You Need to Restring a Rudraksha Mala?
For a basic repair, gather:
- Strong cotton, silk or suitable jewellery cord
- A thin beading needle, if required
- Small scissors
- A clean cloth
- A bead tray or shallow container
- The original guru bead and tassel
- A measuring tape
Choose thread that is strong enough to support the beads but thin enough to pass through their existing holes.
Cotton is commonly used for traditional malas, while silk and specialised jewellery cords may also be suitable.
The best choice depends on bead weight, hole diameter, flexibility and how frequently the mala is worn.
Avoid forcing thick thread through narrow Rudraksha holes. Doing so can damage the bead.
How to Restring a Rudraksha Mala: Step-by-Step
Step 1: Count and Arrange the Beads
Start by checking the total number of beads.
A traditional Japa Mala commonly contains 108 counting beads, often with an additional guru bead.
However, not every Rudraksha necklace follows this arrangement.
Kanthas, bracelets and specialised Mukhi combinations may contain different numbers.
Arrange the beads in their intended sequence before starting.
If the original mala was a mixed-Mukhi combination, use photographs or documentation to restore the arrangement accurately.
Step 2: Inspect the Bead Holes
Look carefully at the holes through which the thread passes.
Check for:
- Cracks around the openings
- Sharp edges
- Loose fragments
- Old thread residue
- Signs of previous repairs
Do not enlarge the holes with a drill or sharp tool simply to accommodate thicker cord.
This is particularly important for rare specimens such as 14 Mukhi Rudraksha or 17 Mukhi Rudraksha.
Modifying an expensive bead can affect its condition and collectible value.
Step 3: Measure the New Thread
Cut enough thread for the complete mala, leaving additional length for knots, the guru bead and the tassel or fastening.
The required length depends on:
- Number of beads
- Bead diameter
- Spacing between beads
- Knotting style
- Intended necklace length
If you plan to place a knot between every bead, allow considerably more thread than you would for a simple continuous string.
It is better to begin with extra cord than discover halfway through that the thread is too short.
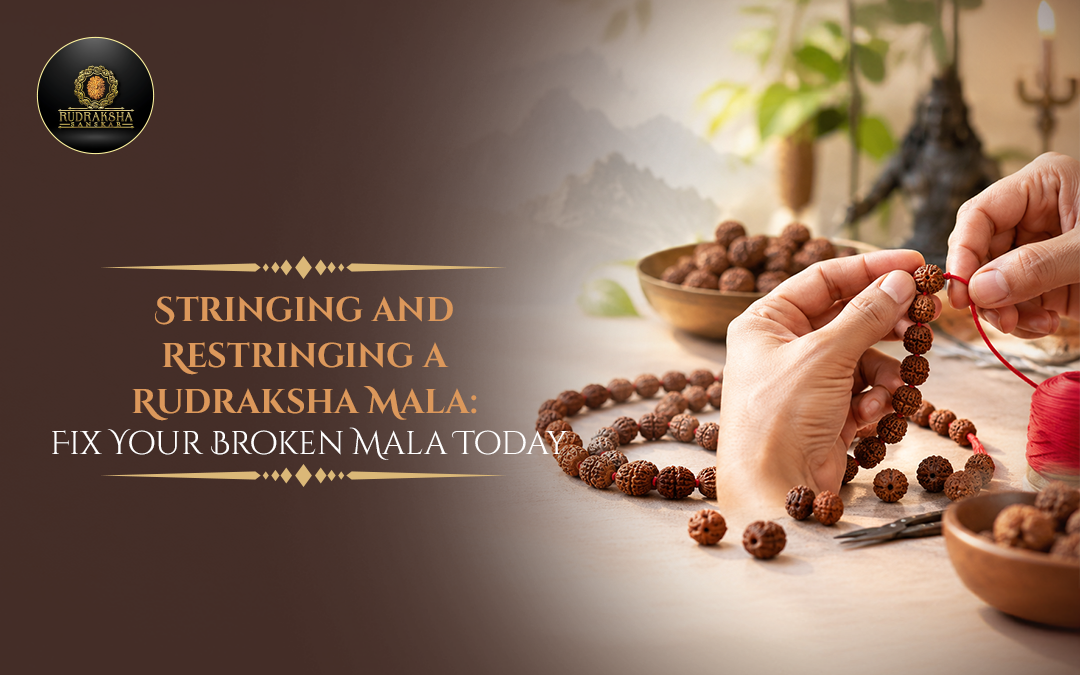
Step 4: Begin Stringing the Rudraksha
Pass the thread gently through the first bead.
Continue adding the beads in their correct order.
Keep the thread straight and avoid unnecessary twisting.
If a bead resists, stop and inspect the hole rather than pulling harder.
For a traditional knotted mala, make a secure knot between beads as you progress.
These knots can help reduce direct bead-to-bead contact and limit how many beads scatter if the cord breaks.
Step 5: Maintain Comfortable Spacing
One common mistake is pulling the thread too tightly.
A mala should have enough flexibility to move naturally.
Excessively tight stringing can create tension around the bead holes and make the necklace uncomfortable.
On the other hand, very loose stringing may allow unnecessary movement and friction.
Aim for a balanced arrangement that is secure without being rigid.
Step 6: Attach the Guru Bead
If your mala includes a guru bead, position it according to the original arrangement.
In many traditional Japa Malas, the guru bead marks the meeting point of the counting sequence.
It is generally treated differently from the 108 counting beads during mantra repetition.
Secure the thread using an appropriate knotting method.
If your mala has a tassel, attach it carefully without placing excessive tension on the guru bead.
Step 7: Secure the Final Knot
Once all beads are in place, inspect the entire mala before trimming the remaining thread.
Check that:
- Every bead is present.
- The sequence is correct.
- The knots are secure.
- The guru bead is properly positioned.
- The necklace moves comfortably.
Use a secure finishing knot appropriate for the chosen cord.
Avoid applying glue directly to the Rudraksha. If a cord manufacturer recommends a knot sealant, ensure it is compatible with the material and kept away from the beads.
Step 8: Test the Mala Gently
Before wearing the repaired mala, hold it over a soft surface and inspect the finished stringing.
Apply only light, controlled tension to check the knots and connections.
Do not pull aggressively.
If the thread slips, the knots loosen or the beads appear under pressure, correct the problem before wearing it.
Should You Knot Between Every Rudraksha Bead?
Knotting is often a practical choice, particularly for traditional malas.
It can provide several advantages:
- Reduces direct friction between beads
- Helps maintain spacing
- Makes the mala more flexible
- Limits bead loss if the thread breaks
- Gives the necklace a structured appearance
However, not every Rudraksha necklace needs individual knots.
Some Kanthas use different arrangements, metal fittings or decorative separators.
The appropriate construction depends on the necklace’s design and intended use.
Can You Restring a Rudraksha Mala at Home?
Yes, for a simple mala containing common, undamaged beads, home restringing may be manageable.
However, professional assistance is preferable when:
- The mala contains rare higher Mukhi.
- Beads have damaged holes.
- The necklace uses precious metal fittings.
- The original arrangement is complicated.
- Special natural formations are included.
- The beads are individually certified.
- You are unsure how to secure the thread properly.
For example, a mala containing Gauri Shankar Rudraksha or Trijuti Rudraksha deserves additional care.
These natural formations may have delicate areas that should not be placed under unnecessary pressure.
Does a Broken Rudraksha Mala Lose Its Spiritual Significance?
A broken thread does not automatically mean the Rudraksha has lost its spiritual significance.
Some traditions attach symbolic interpretations to a mala breaking, but there is no universal rule that every broken mala represents bad luck or negative energy.
Often, the explanation is simply physical wear.
If the beads remain intact, they can generally be restrung.
If your spiritual tradition follows a particular purification or re-consecration practice after repair, you may choose to observe it.
There is no need to assume that replacing the thread requires replacing every bead.
How Often Should You Restring a Rudraksha Mala?
There is no universal replacement schedule.
The frequency depends on:
- How often you wear the mala
- Thread material
- Bead weight
- Moisture exposure
- Knot condition
- Daily handling
Inspect your mala regularly.
If you notice fraying, stretching, loose knots or damaged fittings, consider restringing before the thread breaks completely.
Preventive maintenance is much easier than recovering scattered beads.
Common Mistakes to Avoid While Restringing
Using weak thread: Choose cord suitable for the weight of the beads.
Pulling too tightly: Excessive tension can affect flexibility and place stress on the bead holes.
Changing the sequence accidentally: Record the arrangement of mixed-Mukhi malas before dismantling them.
Drilling larger holes: Avoid modifying the natural bead to fit your thread.
Using excessive glue: Adhesives can affect the bead’s surface and condition.
Ignoring damaged beads: A cracked bead should be assessed before being restrung.
Repairing expensive combinations without experience: Professional restringing may be safer for premium specimens.
A Broken Thread Doesn’t Mean the End of Your Mala
A Rudraksha mala can remain meaningful and useful long after its original thread wears out.
In many cases, all it needs is careful restringing.
Remember the essentials:
Collect the beads.
Check their condition.
Preserve the original arrangement.
Choose suitable thread.
String and knot carefully.
Inspect the finished mala before wearing it.
For rare or valuable combinations, seek professional help rather than risking damage through an uncertain repair.
Whether you are restoring an old mala or preparing to buy rudraksha online, understanding proper stringing helps protect the beads and preserve their condition. The thread may need replacing, but a well-maintained Rudraksha mala can continue to be part of your spiritual practice for many years.
FAQs
Yes. A simple mala with undamaged beads can often be restrung at home using suitable cord and careful knotting. Complex or expensive combinations may require professional assistance.
Strong cotton, silk or suitable jewellery cord may be used. Choose according to bead weight, hole size, durability and intended wearing style.
Check the original bead count and arrangement. For a traditional 108-bead Japa Mala, replacing a missing counting bead may help restore the intended configuration. For mixed-Mukhi combinations, ensure the replacement matches the required Mukhi.
Generally, yes, once the beads and thread are secure. Follow any additional practices observed within your spiritual tradition.
Not necessarily. Thread breakage is commonly caused by ordinary wear, friction, moisture or accidental pulling.
Avoid applying glue directly to Rudraksha beads. Secure knots and appropriate cord are preferable for ordinary restringing.